
Information about How To Install Oracle RAC 10gR4 CRS Home Patch
This document will describe how to Patch CRS to 10gR4 on Oracle RAC. You must follow the Prerequisite Information below in order.
Document Creator
Todd Walters
Requirement
All these Sections must be complete before installing CRS patch on RAC Servers
Pre Installation Guide
1. How to Install Linux Oracle RAC Virtual Server
2. Prepare Linux Virtual Servers for Oracle RAC
3. Prepare Linux Physical Servers for Oracle RAC
4. How To Configure Oracle RAC OCR and Voting Disks
Oracle Software Installation Guide
1. Prepare Linux Environment for GUI Access for Oracle Installation
2. Linux Oracle RAC Installation Guide
3. How to Install Oracle 10gR2 CRS
4. How to Install Oracle 10gR2 ASM
5. How to Install Oracle 10gR2 DB Home
6. How to Install Oracle 10gR4 CRS Patch
7. How to Install Oracle 10gR4 ASM Patch
8. How to Install Oracle 10gR4 DB Home Patch
9. How to Configure Oracle ASM Disks for RAC Virtual Servers
o For Physical see How to Configure ASM Disks for Physical Servers guide.
10. How to Install Oracle 10gR4 ASM Instance
11. How to Install Oracle 10gR4 Database Instance
Patch Software Location: Oracle/software/rdbms/patchset/10.2.0.4/linux_64bit/Disk1
How to Install Oracle RAC 10gR4 CRS Home Patch
Login to VNC Viewer as before
Change directory to CRS Patch Software location
srv0dbxd11 | ORA1020 | /export/home/oracle
> cd /Oracle/software/rdbms/patchset/10.2.0.4/linux_64bit/Disk1
> cd /Oracle/software/rdbms/patchset/10.2.0.4/linux_64bit/Disk1
Start OUI Installer for CRS Patch
srv0dbxd11 | ORA1020 | /Oracle/software/rdbms/patchset/10.2.0.4/linux_64bit/Disk1
> ./runInstaller
> ./runInstaller
At CRS Install Welcome Screen Click Next
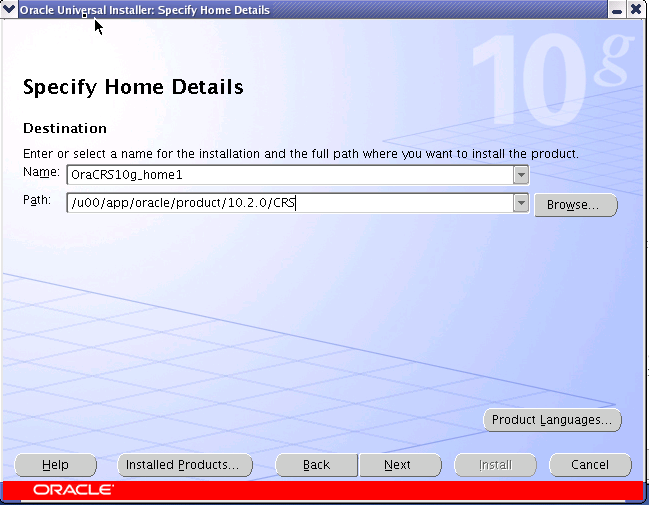
At Specify Home Details screen edit location to CRS then click Next
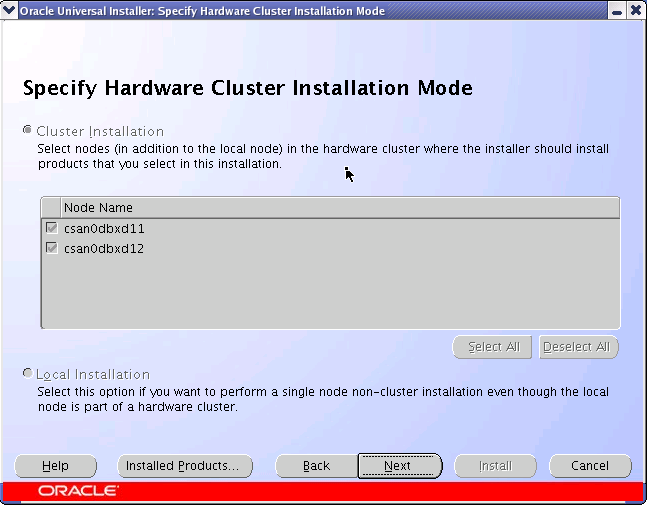
At the Specify Hardware Cluster Installation Mode screen, Verify Nodes are shown and click Next.
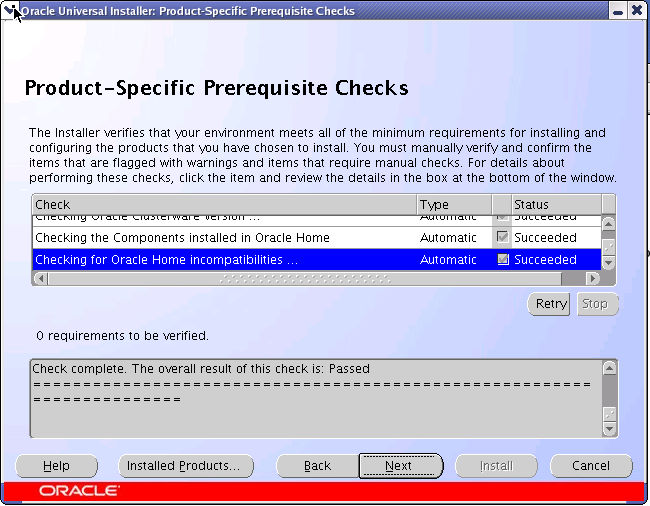
At the Product-Specific Checks screen, make sure everything Passes and then click Next.
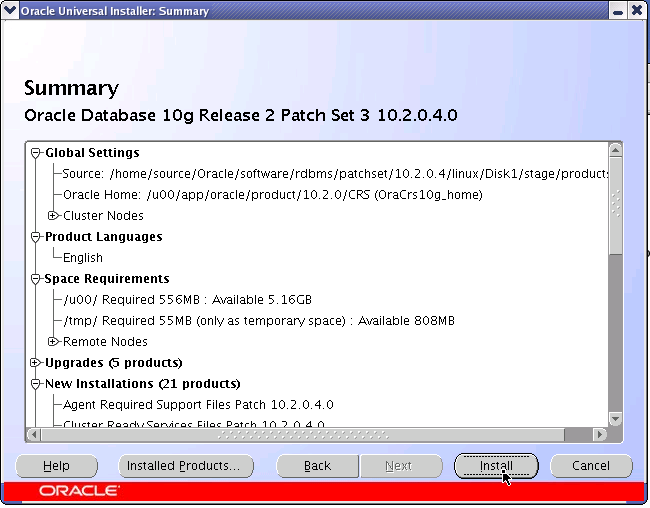
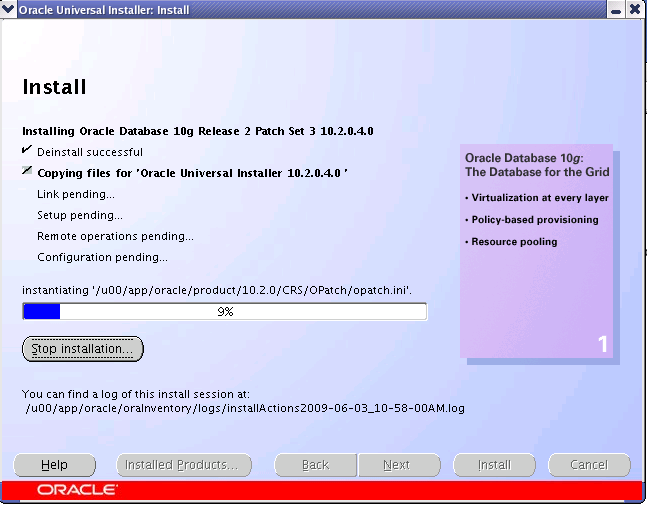
At the CRS Patch Summary page, review and then click Install
CRS Patch Installation Progress
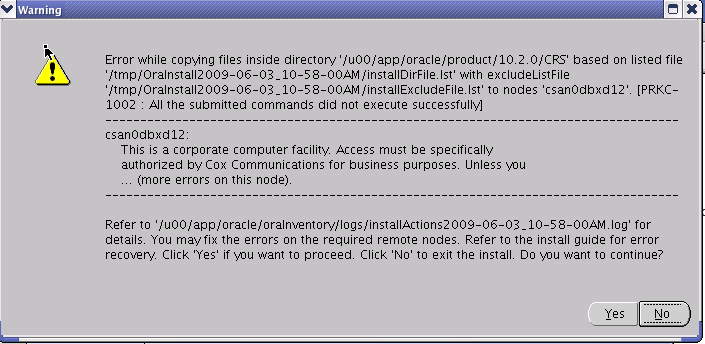
At the Error Box click Yes to Continue (Will error twice, click Yes to continue)
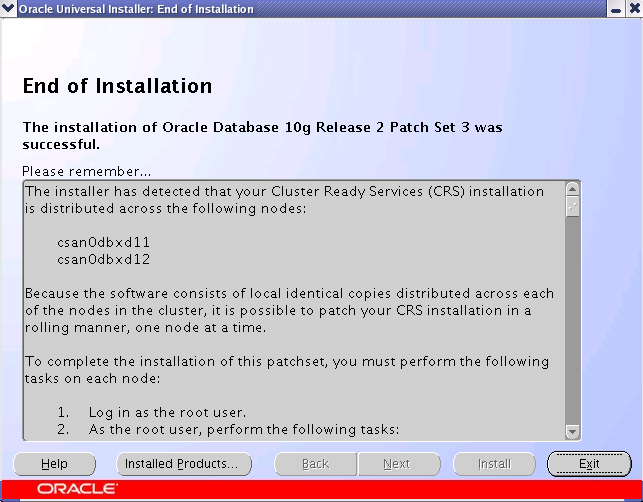
At the End of Installation screen, click Exit then click Yes to Exit. Next continue to run Post Patch Scripts in Step 12.
Run Post-Patch-Installation scripts to complete the installation of this CRS Patchset
Before having the Sys Admin run the below, go to the CRS $ORACLE_HOME/lib and make sure the libclntsh.so.10.1* is owned by oracle:dba. If not, get Sys Admin to chown this before he runs the scripts below.
chown oracle:dba /u00/app/oracle/product/10.2.0/CRS/lib/libclntsh.so.10.1
Change directory to CRS LIB
srv0dbxd11 | CRS | /export/home/oracle
> cd /u00/app/oracle/product/10.2.0/CRS/lib
> cd /u00/app/oracle/product/10.2.0/CRS/lib
List ownership of file libclntsh.so.10.1*
srv0dbxd11 | CRS | /u00/app/oracle/product/10.2.0/CRS/lib
> ls -l libclntsh.so.10.1*
-rwxrwx--- 1 oracle dba 20526416 Jun 2 12:37 libclntsh.so.10.1*
> ls -l libclntsh.so.10.1*
-rwxrwx--- 1 oracle dba 20526416 Jun 2 12:37 libclntsh.so.10.1*
To complete the installation of this patchset, you must perform the following tasks on each node:
Log in as the root user on node 1
As the root user, perform the following tasks:
Shutdown the CRS daemons by issuing the following command:
[root@srv0dbxd11 ~]# /u00/app/oracle/product/10.2.0/CRS/bin/crsctl stop crs
Stopping resources.
Successfully stopped CRS resources
Stopping CSSD.
Shutting down CSS daemon.
Shutdown request successfully issued.
[root@srv0dbxd11 ~]# /u00/app/oracle/product/10.2.0/CRS/bin/crsctl stop crs
Stopping resources.
Successfully stopped CRS resources
Stopping CSSD.
Shutting down CSS daemon.
Shutdown request successfully issued.
Run the shell script located at:
/u00/app/oracle/product/10.2.0/CRS/install/root102.sh
/u00/app/oracle/product/10.2.0/CRS/install/root102.sh
This script will automatically start the CRS daemons on the patched node upon completion.
Creating pre-patch directory for saving pre-patch clusterware files
Completed patching clusterware files to /u00/app/oracle/product/10.2.0/CRS
Relinking some shared libraries.
Relinking of patched files is complete.
WARNING: directory '/u00/app/oracle/product/10.2.0' is not owned by root
WARNING: directory '/u00/app/oracle/product' is not owned by root
WARNING: directory '/u00/app/oracle' is not owned by root
WARNING: directory '/u00/app' is not owned by root
WARNING: directory '/u00' is not owned by root
Preparing to recopy patched init and RC scripts.
Recopying init and RC scripts.
Startup will be queued to init within 30 seconds.
Starting up the CRS daemons.
Waiting for the patched CRS daemons to start.
This may take a while on some systems.
.
10204 patch successfully applied.
clscfg: EXISTING configuration version 3 detected.
clscfg: version 3 is 10G Release 2.
Successfully accumulated necessary OCR keys.
Using ports: CSS=49895 CRS=49896 EVMC=49898 and EVMR=49897.
node <nodenumber>: <nodename> <private interconnect name> <hostname>
node 1: srv0dbxd11 srv0dbxd11-ic srv0dbxd11
Creating OCR keys for user 'root', privgrp 'root'..
Operation successful.
clscfg -upgrade completed successfully
After completing this procedure, proceed to the each node in the cluster and repeat.
Next, check what CRS Version is installed.
srv0dbxd11 | ORA1020 | /export/home/oracle
> crsctl query crs softwareversion
CRS software version on node [srv0dbxd11] is [10.2.0.4.0]
> crsctl query crs softwareversion
CRS software version on node [srv0dbxd11] is [10.2.0.4.0]
srv0dbxd11 | ORA1020 | /export/home/oracle
> crsctl query crs activeversion
CRS active version on the cluster is [10.2.0.4.0]
> crsctl query crs activeversion
CRS active version on the cluster is [10.2.0.4.0]
When CRS Patching is complete, return to Linux Oracle RAC Installation Guide or go to Section 6: How to Install Oracle 10gR4 ASM Patch Guide
No comments:
Post a Comment